Monday, January 26, 2009

Mile 238K: Left hand canyon, more pics.

Photobucket Album

Monday, January 5, 2009

Mile 279,893: Treadwright BFG A/T 30" retreads.


I got 5 treadwright 30" A/T BFG retreads mounted last friday, I've had time to drive them on highway, off-road, and in the snow (light) since then. Here's the verdict:

Fit: These tires fill up the wheel well, giving my XJ a more beefy look. They have very minimal rubbing on turns, and no rubbing in back on flexes (I don't have front disconnects yet....slacker.). My spare tire also fits in the stock mount spot, but does require some fighting with the liftgate to close.

Balance: They balance terribly, no lie. I looked at the spare, two massive weights on one side to balance it out, I can feel some vibe coming from the rear end not being balanced so well.

Road noise: Both on highway and off, these tires are quiet. No more noise than my other ones, even at speeds of 75mph they didn't make much noise at all, would easily blend in with other vehicle noise.

Off-road performance: The tires handled well, even when aired down to 20~25 psi. Very grippy overall, impressive handling on the sandy/rocky trail I went on (see trail report: lefthand canyon).

Weather: I had a few different times to test these out on snow and ice. On the trail, there were a couple spots where there was some old snow on the ground. On regular snow, these tires handled fine, with good grip and plenty of stopping power. On ice, these tires handled decently too, including the patch of ice I went over on about a 30% grade, but I could not start from a dead stop on this patch of ice, I had to back up until I was on gravel; they did hold up their speed alright though.

Delivery time: Alright, I'll give them the holiday mercy for delivery time, but it was still longer than posted. At time of order, delivery time was expected to be 6-10 business days. I called them once, they said they would look into why the delivery was taking so long, and I should get a call the next morning. I did not recieve that call, but after heckling the man I spoke with that day, I finally got a tracking number out of him. After about business day 12, the tires arrived on my front porch, I did not sign for the tires. Because no signature was required, you may want to request a signature upon delivery or else make sure someone is home.

Treadwright service: Service was decent, at best. I ordered over the phone. They were anxious to get my payment information, but gave me very little information on the tires themselves until I asked for it. At the end of the call, I noticed they neglected to mention how much these five tires would be, they said a figure around $400.

Ratings:
Grip: 4.7/5 - Other than a patch of ice I was on, I encountered very little in the way of grip problems, these tires hav excellent traction:
Noise: 5/5 - Way quieter than I expected, also way quieter than comparable A/T tires I have heard on vehicles with them equipped.
Cost: 5/5 - Even after $62.50 mounting fee (the cheapest I could find, Big O tires did mount/balance for this amount, I kept the old tires to resell.), these tires were the cheapest for five all-terrains I could find: $473.40, after all was said and done.
Balance: 3/5 - They're balanced at lower speeds, but develop vibe on the highway after about 60 mph; this shouldn't be too big of a problem since I'm rarely up that high speed.
Treadwright service: 2/5 - The staff was semi-helpful in pointing me in the right direction, but failed to verify information or ship in an expiditious manner. When they promised to call back, they again failed here. I had to call them three different times in order to get the shipping information for my tires, after they were already two days late.

Overall: 4.5/5 - these tires work great for what I need, but I was not very happy with treadwright's performance. The amount of weight these things need to balance also upsets me.

Until next time,
1,000,000 Miles Strong.

Mile 238,000: Trail report - Lefthand canyon.

The friday before this ride when I was getting my tires mounted, I met up with a man named charlie who informed me he was going on a trail ride the next day, after some jeep talk. We headed up lefthand canyon in Boulder, CO. The trail was mostly clear of snow, I made off with only one real bit of trail damage....will talk about at end of story.

Notes:
The mercedez pictured did NOT go on the run, after some serious coaxing with the driver (guy in brown with gelled hair, seen on far right in picture of squeeze)
The tank-looking thing is an old swiss army military vehicle. Carries approx 10 people. Awesome rig, easy to roll though.

Here's the start, us at the 'staging area' for the trail... buckingham park. About 12 rigs were all up on this trail.


Some Pics of us heading up the starting area, before old mother hill.


No pictures of old mother hill or me attempting it, but I'll tell the story: I made it up the first 'half' of the hill (from what I could recall), fighting for every inch of it. When I got to the second little (only in distance) climb, I had a bad approach and decided to try again from a different angle. When attempting to move over to the right side of the trail to try again, I got stuck with my wheels in ruts, apparently stuck on my long body and kinda high-centered (See: Gore). I slid down the hill about 6in, giving everyone below me a real good scare. With some clever help from a rock (thanks to a fella named Hugo), I got unstuck and got myself turned around and headed back down.

Here is a poser pic at the start of mother hill:


More trail:


My favorite light:


After that, we took the branch headed down to the squeeze, 12 rigs does not fit well here, seeing as how this is a pretty popular point and three branches of the trail meet up here. The group split in half here after one group got stuck in front of some ATV's while they were parked on the high trail and had to head on down. Another three decided not to attempt the squeeze and headed back on down the other branch. I actually made it up (will post vid when I get it).
The squeeze:


After that, we continued to follow the trail out to where it dumped out onto the road again. All went well in this part. Overall, a good trail that gave me a lot of experience.


Gore:
A couple scratches on my wheels, nothing to worry about.

A couple dents and dings to my transfer case skid, nothing to worry about.

A scratch on my unibody, just took some of the old dirt off of there. Did you know those things are shiny silver?

The biggie: I dented in the driver's side of my gas tank, which cracked it. It's leaking pretty fast so I'm going to try to replace it this monday.

Things I've learned:
Traction is the magic word! It doesn't matter what lift you have, it matters what kind of traction you have, followed in a very close second by armor.
ARMOR ARMOR ARMOR IS KEY! get your underbelly armored up good and tight, DON'T FORGET THAT GAS TANK!

Bring a sandwich or other easily edible hand-food for lunch, chili in a thermos seems like a great idea at first....but you'll be wrong.

Funny quotes:
"Come on guys, that mercedez is a military vehicle! I have Dana 60's and 1.5mm on the body, full skid plates underneath!" "Yeah, but it's just too pretty to bring up here."

"Hey, Jon (me), you've got a leak over here." "It's not leaking, it's just marking its territory!"

(over CB) "Hey charlie, what's the plan for lunch?" "Eat on the fly." "Do you have any idea how hard it is to eat chili on the fly??"

Until next time,
1,000,000 Miles Strong.

Thursday, December 18, 2008

Mile 237,010: Rear sway bar disconnect

Hey, long time no see. Haven't written in a while, been dealing with finals and such...which, unfortunately, ranks just slightly more important than jeeping. To make it up to you guys, I have a bunch of new articles to write, which I'll try writing once a day. For today: how to remove your rear sway bar.
A quick note about the title: this project was actually done about 500 miles ago.

WHAT'S A SWAY BAR??
A sway bar (also stabilizer bar, anti-sway bar, roll bar, or anti-roll bar, ARB) is an automobile suspension device. It connects opposite (left/right) wheels together through short lever arms linked by a torsion spring. A sway bar increases the suspension's roll stiffness—its resistance to roll in turns, independent of its spring rate in the vertical direction.

Translation: it keeps one side of your suspension from contracting more than the other, which in turn keeps the vehicle stable on turns at the price of reduced articulation.

Safety note: Removing your rear sway bar will not make your vehicle unsafe, but it will pitch quite a bit more when driving it. Keep this in mind, ease back into driving it and get a good feel for it.

What you will need:
A buddy (no really, they'll cut the time to do this in half)
Breaker bar
WD-40 (optional, but really helps)
PB Blaster (optional, but really helps)
Jack
Two jackstands
Lug wrench/lug fittings
Wrenches, either ratchet or box. (I totally forgot the size.)

Difficulty rating:
2 Wrenches out of 5. Requires ability to identify a sway bar, but no special skills needed other than that.

Dirty rating:
1 Dirty rag of 5. Most of the dirt in this area is kicked up from the road. You can help this quite a bit by washing your rear undercarriage really good before you do this repair at a do-it-yourself wash.

Time:
About 30 minutes.


To begin: jack up the rear axle, placing each end on jackstands and remove the rear tires. You can either begin on the left or right side, but you will repeat the process on the other side as well.
To begin, remove the outer U-joint attached to the axle. Your axle will not fall, but this releases where the sway bar is connected to the axle itself. If you have trouble getting any bolts/nuts loose, put some PB blaster on and wait a little while. WD-40 helps too.
Photobucket

Move the sway bar up as much as possible, have your buddy hold the sway bar up and rebolt your u-joint. and torque it tight. Repeat this process on the other side of the vehicle. Once you have removed the sway bar from the axle, now disconnect it from the unibody. In this picture here, you can see the two spots the sway bar mounts to the unibody in the top left, along the black bar. There is a ratchet fitting seen center, this is sitting on the sway bar as an identifier only, and this fitting takes no role in the removal of the rear sway bar. Follow the bar left from the ratchet fitting to the unibody of the vehicle. The mounting bracket here is what you will remove.
Rearswaybardisco001.jpg picture by korinthan
After you have removed these bolts, the sway bar will be free from the vehicle. Pull it out and set it aside. If you so desire, this piece can be cannabalized for parts. Reattach the wheels and lower your jeep back down.

Congratulations! You have just increased your articulation!
Here's some before/after pictures.
Before:
1202081556.jpg picture by korinthan
1202081534.jpg picture by korinthan

After:

1210081434.jpg picture by korinthan
1212081007.jpg picture by korinthan

As you can see, I have much more articulation. My RTI score (Ramp travel index: distance the front wheel on either side can be above the wheel behind it when one of the front wheels is up off the ground.) went up from about 382 to 443, which is good. It handles a little differently, taking a little bit more effort (not much, just barely noticeable) to hold the wheel around a turn, it also pitches a little bit more on the turn. I have a much easier time keeping the back end from skidding, the result of something called 'understeer.' In winter time, this is huge. I have much better traction overall after this project.

Until next time,
1,000,000 Miles Strong.

Tuesday, December 2, 2008

Mile 236,567: RTI Test Simulation (With howto)

So thanks to me seeing someone else do this, I did an RTI test with a jack, took pics too. Measured clearance from ground to the tire in the air was 13", all four tires had contact with the ground. Here's a picture of me doing the test. I scored a 376.


Here's a stretch photo:


I did this as kind of a baseline test before I started modding, also wanted to describe how to do this kind of RTI test (as well as how to get your score)

An RTI Test is defined as such (sited from 4lo.com)
Ramp Travel Index is based on climbing a 20 degree ramp with one tire while keeping the trailing tire in line. At the point where any tire begins to lift into the air is where it's calculated. Measure from the bottom of the ramp to the center of the bottom of the tire (use a plumb from the hub to find center). This distance traveled in inches is divided by the wheelbase in inches and multiplied by 1000. What this gives you is a percentage of travel up the ramp in relation to your wheelbase.

Formula:
RTI = Tire Height/sin(20*PI/180)/Wheelbase*1000

Things you will need:
- 2 jacks or one jackstand and one jack, one of which should be the floorjack style and the other should be a straight-up design and preferably mechanical (such as a scissor lift)

Note: The jackstand is a safety measurement and is not required, but HIGHLY RECOMMENDED!

- Tape measure
- Wheelbase measurement (101" on XJ's) (http://www.cherokeeforum.com/showthread.php?t=6345)
- RTI Calculation formula/calculator (http://www.4lo.com/calc/rticalc.htm)

Extra skills and things needed:
- 4wd Engaged
- A good sense of safety/smarts
- Ability to operate jack

This project is rated at 0 of 5 dirty rags (my hands are still clean, some ground crawling) and 1 of 5 wrenches (some special stuff needed, must know jack points and jack capabilities)

Quick note: Having a jack that lifts straight up (such as a scissor lift or bottle-style jack) is extremely handy, as hydraulic arm jacks will more easily dislodge at the higher end of their lifting capability, this may not be an issue on SMOOTH pavement.

Before you begin, make SURE your 4wd is engaged and emergency brake is on. This will keep your front wheel from having too much play in it when you lift it. If you do not engage 4wd or take other such safety measures, you risk heavy machinery (such as your vehicle and the jack) moving at high speeds in close proximity to each other AND YOU. Also make sure all of your tires are properly inflated to avoid a blowout.

To begin, lift up your front wheel (pick either driver's side or passenger side) high enough to fit your jack under the bottom of the tire. Make sure that when you place the jack under the tire, it is located at the BOTTOM of the tire. Very carefully raise the tire, keeping the jackstand as close to the axle as possible (watch your fingers, keep your head low.). Continue to lift your front wheel while watching the back wheel on the same side. As soon as the back wheel breaks free from the ground, lower your front wheel until the back wheel reconnects with the ground. This is the point where you will measure your RTI. Measure from the base of the wheel to the ground. Take this measurement and use it in the RTI calculator linked above. Fill in the Inches tire above ground and Wheelbase Inches section.

Congratulations, you have successfully measured your RTI score!

Sunday, November 30, 2008

Mile 236,527:What happens when I can't work on my jeep.

I got bored at work while thinking about my lift kit, the result is a rough sketch of my jeep doing some rock crawling.


Until then,
1,000,000 Miles strong

Mile 236,417: General update

Today I replaced my center caps on my front wheels, one had fallen off and another was on its way. I'm glad I got those replaced, now I have four wheels with centercaps. It snowed yesterday, so I went out and played in the snow. My friend brought their truck along too, and I can honestly say that A/T tires make a huge difference in performance over my baja tires. I was kinda sold on how well they worked before, but now I'm completely sold on it now. Unfortunately, playing in the snow can have its detrimental effects too. I took a nail in one of my tires (got it fixed for free at Discount tire co.) and bent my front license plate holder pretty bad after driving off a ledge that was a little too big for my XJ. The slope itself wasn't a problem, but it didn't round out at the bottom like I thought it would; there was a curb there instead (I have NO idea why, the road doesn't even go all the way through). I'll be able to salvage the front part that frames the plate, but the actual plate holder is bent up pretty bad and I'll have to get a new one of those.
I haven't been writing many blogs lately, I've been saving up my monies for a 3" lift kit. Come January, I should have quite a few more blogs to write, but I'll try to keep you guys updated on things between now and then.

Until then,
1,000,000 Miles strong

Sunday, November 23, 2008

Mile 236,228: Transmission fluid refill (tutorial)

My transmission when I was whining unusually loud whenever I was in second gear, I also noticed some leakage coming from my transmission. IF YOU EVER HEAR ANY NOISE COMING FROM EITHER THE ENGINE COMPARTMENT OR DRIVETRAIN THAT IS NOT NORMAL, STOP IMMEDIATELY. Figure out what's wrong before you drive on it much further.

Note: unlike my tune-up thread, this one doesn't have as many pictures, my hands were pretty full.

How to: Add more transmission oil to your 5-speed manual transmission.


Difficulty: 2 wrenches out of five. Although this project doesn't require any special skills above operating a wrench, it does require some special equipment.

Grime factor: 2 rags out of five. There is some oil spillage involved, but my hands were clean enough I didn't really need too much hand cleaner.

Completion time: 10~15 minutes. The process itself doesn't take too long, but you have to do some slow pumping, and that chews up time.

Tools and parts needed:
Rags. I used two.
A buddy can come in handy to help you refill your siphon pump.
a level parking spot or a means to level out your vehicle.
anywhere from 1~4 quarts 80W100+ manual transmission oil, depending on whether you are doing a change or fill (I used two, I was in pretty bad condition)
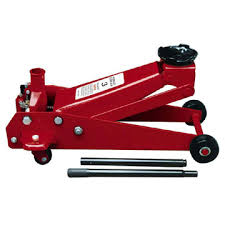
Siphon pump for getting oil into transmission, costs about $5. (Pictured left, sprayer fluid on right is for scale. This is a 1 pint siphon pump)

Means to loosen the transmission nut, I have a modified 3/8" wrench piece, machined down to fit. I will refer to this as "t-fit"

Wrench to fit your t-fit (not pictured).

Skills needed:
Ability to operate wrench
Ability to operate siphon pump

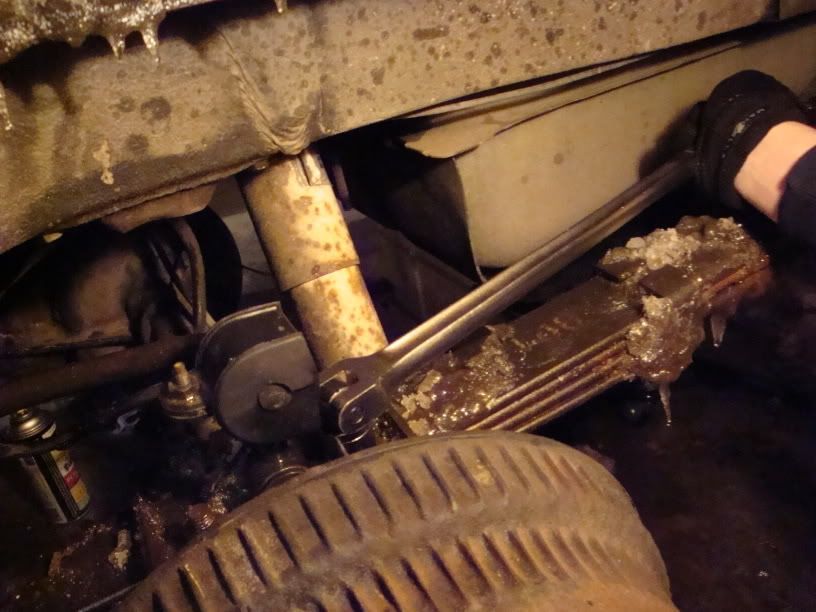
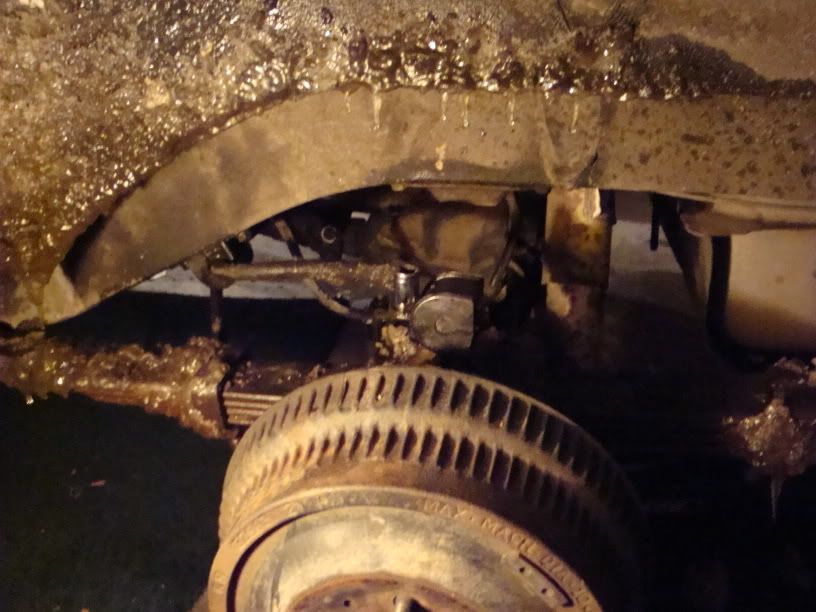
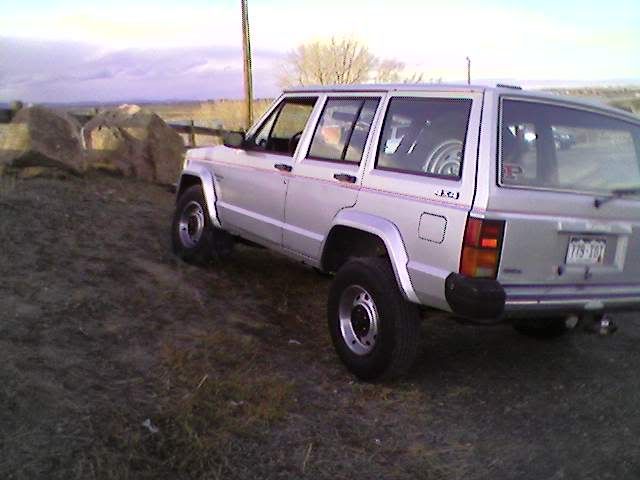
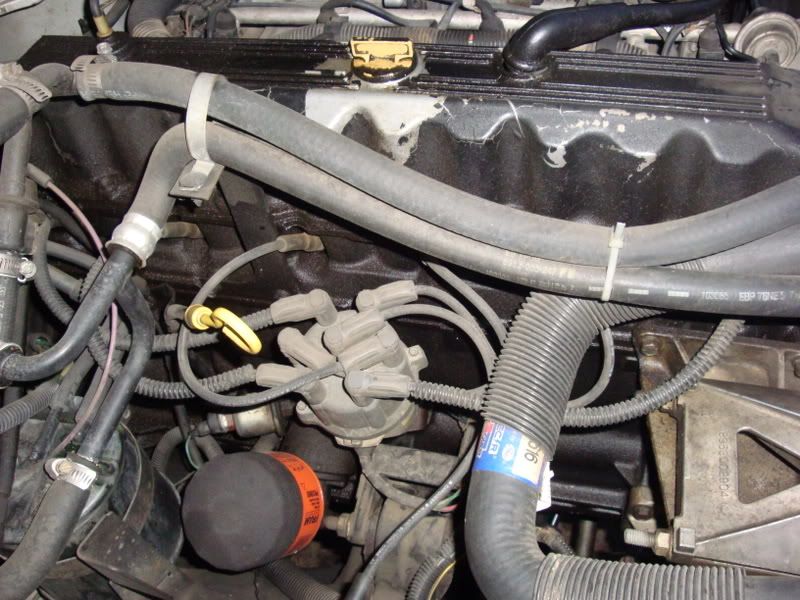
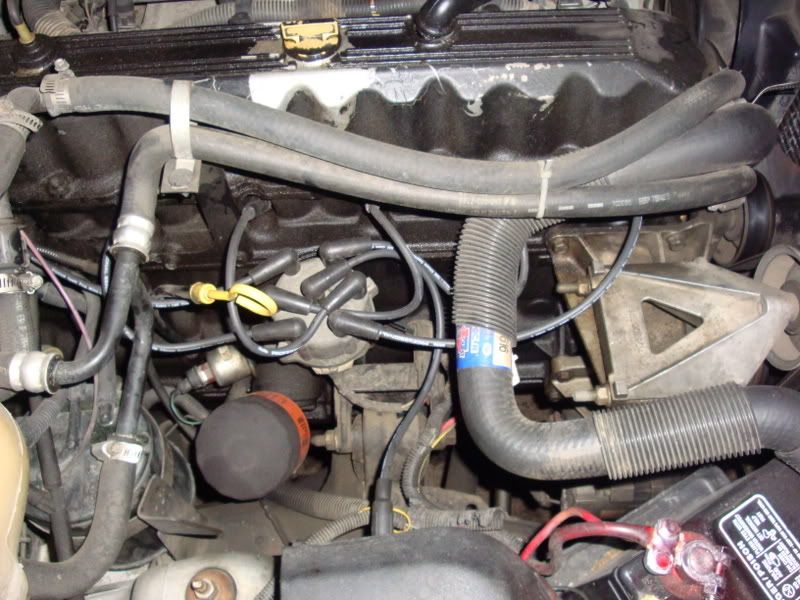
Here is a picture of the bolt you will loosen, I took my jeep to the car wash (user-operated quarter kind) and cleaned off my underbody with some tire cleaner and then the power washer, followed by a rag wiping.

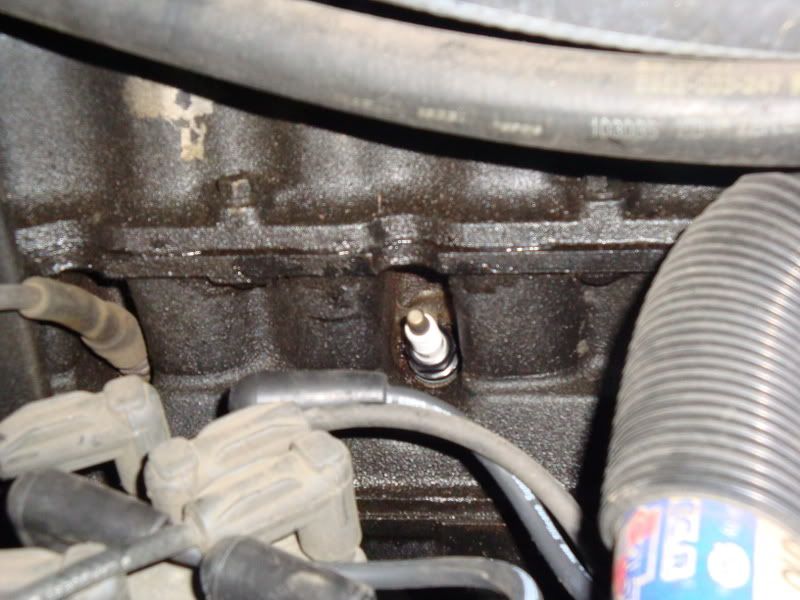
To begin, locate the FILL bolt for your transmission. One will be lower on the transmission and was the first one I found. THIS IS NOT THE ONE YOU WANT. If you loosen this one, it will empty out your transmission fluid. The bolt you are after to fill your transmission is higher up, about 2/3 of the way up the tranny (transmission) and I found mine located right above the tranny support strut, as pictured below.

It should be about an inch in diameter. Use your t-fit wrench on this to loosen it. It is a right hand bolt (righty tighty, lefty loosy), but is pretty tight and can take some muscle to loosen. Because of the way it is molded, your t-fit wrench could pop out, some pressure to the back of the wrench to keep it in place may be necessary. The bolt is about one inch long with a pretty fine thread, but once you have it broken loose, you should be able to loosen it by hand. You may want to keep your t-fit wrench on there to give you some grip, it can get pretty slippery.

Once remove the bolt (go ahead and take it all the way out, but be careful not to lose the washer that is on it.), reach inside the hole you just removed the bolt from. Be careful, the threads here can be sharp, so try not to turn your finger too much. Even though you can't fit your finger in there all the way, you should be able to feel if there is any oil on the parts in there (there should be) and if the oil is anywhere near the top. If you have been hearing any whining, it isn't.

Take the top off your transmission fluid (even though some of them come with that ketchup-style squirt top) and stick your siphon pump in, go ahead and go all the way to the bottom to make sure you pull as much fluid as possible. SLOWLY pull the fluid into the siphon. Pulling slow insures that you won't pull air, or if you pull air you won't pull as much. Once your pump is about an inch from being fully extended, pull it out of the oil and turn the tube so it is upright. Wipe it off as soon as possible (from the siphon itself towards the end of the tube) to minimize mess. Place the siphon tube into the fill-hole in the transmission. Push the tube in about as far as you can (the goal is to get beyond that inch of threads in there, remember those?) and slowly push the siphon back in, filling up your transmission. Repeat this process until your transmission starts to drip oil down the outside. You may not see it immediately. I didn't notice mine was dripping until some landed on my elbow, after it had already pooled on my support strut. Once it is full, replace the bolt, making sure to wipe any debris off the bolt as possible. As with all bolts and nuts, start the bolt by hand, tightening it as far as possible before using a wrench. The part may be slick, wiping everything off as much as possible helps. Tighten this bolt about as far as you can go, should be about 40 ft-lbs of force (or about as tight as you can go).

Congratulations! You have successfully added transmission fluid. Give everything a good look over to make sure that all of the parts have been put back in place. Go ahead and start it up and drive around a bit, noting any noises. If you are still hearing unusual noises, have someone who knows what they are doing (preferably a certified mechanic) take a look at your transmission.


Until then,
1,000,000 Miles strong

Thursday, November 20, 2008

Mile 236,060: Ignition tune-up (with guide!)

I had a problem where my jeep would jolt (just one big shake) when I was driving down the road around 40~50 mph. As it turns out, my ignition wires were arcing ( you can check and see if yours do this by parking in a DARK area and watching the top of the spark plugs for a spark.). So, I'm going to write up a guide on how to fix this problem.

Difficulty: 2 wrenches out of 5. Not the hardest repair in the world, but definitely a little more involved than an oil change.
Grime factor: 3 rags out of 5. My hands were pretty black after I was done and it took a good bit of cleaner to get the stuff off, hands are all clean now.
Completion time: Approximately 20 minutes
Tools and parts needed:
5/8" spark plug socket (as pictured)
ratchet wrench with extender (as pictured)
A good set of pliers (not needle nose)
new ignition wires (box set)
new spark plugs (in my jeep's case, six. You'll need one for each cylinder)
camera (optional, but if you forget the way the wires were arranged, it'll help quite a bit.)
Spark plug gap measuring tool. (they cost like a dollar)

Skills needed:
Ability to operate a ratchet wrench
Know how to check gaps on spark plugs

Tools
Photobucket

Here is a picture of my ignition wires & plugs (spark plugs) before the tune up:


Here is a picture of a spark plug (left) and ignition wire (right):
Photobucket

I start at the left end (I'll call this cylinder 1) and moved my way to the back (cylinder 6). Note: ONLY REMOVE ONE PLUG/WIRE ASSEMBLY AT A TIME! If you remove more than one, you could lose track of which wires hook up to which plug very quickly. This is bad. When you are replacing the ignition wires and spark plugs, try to keep parts organized. This will allow you to easily keep track of which wires and plugs you have already replaced. In this photo, the old wires are on the left along with the old spark plugs. The new wires are on the right. The pliers I used to help pull the plugs out are on the far left. (I kept the new spark plugs up off the ground in their boxes to help keep them clean.
Photobucket

To begin, remove the old ignition wire from both the cap (the black part all the wires are connected to) and the spark plug (the end on the engine block). Make sure when you remove the wires, that you pull them by the base of the plug, if you pull by the wire, you can separate the wire from the plug, making it very difficult to remove. When you remove the wire, make a note of the other wires it crosses over (this is how it's supposed to be) for when you put the new wire back in. Attempt to get it as close to the same as possible, this is where the camera comes in handy to take a picture of how it's set up to reference later.
Photobucket

Step 2: Remove the spark plug from the engine block. Note: if you had been running your car for any duration before the repair, you should let it cool off first, as these parts get very hot. Try not to drop any dirt or blow into the open hole from the spark plug as this leads directly into your cylinder. Once you remove the spark plug, set it down next to the old ignition wire. Here is a picture of my spark plug, ignition wire removed.
Photobucket
Get your new spark plug and check the gap to make sure it is correct. Spark plug gaps vary by plug and car models, so make sure you find out the correct gap. Place the new spark plug in the slot where the old spark plug was, as per your organizational method. Begin threading by hand. If the spark plug is too hard to reach, you can use the socket and extender (but not the ratchet itself!) to give yourself a little more reach. On my particular cherokee, plug #6 was difficult to reach. Make sure the plug is snug, but don't tighten it as far as you can.
Photobucket
Replace the ignition wire, making sure you use the wire that is closest in length to the old one (yes, they come in varying sizes). Remember how much force these took to get off? Keep that in mind when you put the new ones on, they should click into place. To check and see that the ignition wires are fully secured, gently pull the plug out. If it takes little to no force to disconnect it from either the cap or the spark plug, it was not installed correctly.

Repeat this process for all cylinders, the final wire will lead away from the cap. Repeat the same process as you did for the other cylinders, but note that you DO NOT need a spark plug for this connection, all you need is the wire. Once you have finished installing the new wires and spark plugs, check that you have installed all the new parts and haven't missed anything. The finished result should look like this (note that the new wires are darker in color and cleaner than the old ones):
Photobucket

Congratulations! You have completed an ignition tune up! Start up your engine and make sure that it runs smoothly. If you hear any unusual noises or hear that the engine isn't running correctly, shut down the engine immediately and double check your work.


Until then,
1,000,000 Miles strong

Wednesday, November 19, 2008

Mile 236,001

Drove home today, rolled over 236,000 miles on the way! However, I failed to get a picture of it right as it rolled over (I'll make sure I catch 250,000.)
Here's a picture of my jeep looking awesome:
The Wolf Killer

Until then,
1,000,000 Miles strong

Monday, November 17, 2008

Jeep log: 235947 miles

So I took my jeep out in a dark field tonight after work, as it turns out... I have a HUGE ignition arcing problem on cylinders (front to back) 1, 3, and 4. They were arcing almost constantly. I'm going to get the tune up kit tomorrow night (busy jeep night for me) and do that asap. I'll also try and get some pictures of me doing a makeshift RTI score going. I know my score is 682, but I didn't provide any decent pictures of me actually doing the test.

Until then,
1,000,000 Miles strong

Sunday, November 16, 2008

Just occurred to me...you don't have a picture of the jeep in question


Well, here's a picture of the oh-so famous jeep cherokee

Jeep Log: 235905 miles

New fan clutch today. In the process of installing it though, My dad (being the idiot that pushes too hard that he is) broke the fan shroud because he wouldn't move the radiator out by about a 1/2 inch to put it back in. The actual replacement fan clutch had about 1/4 inch more on the front of it than the old one did, making it just a little too big to just slide on much in the same way the old one slid out. So this leaves something else for me to fix now....The fan shroud. Good news is that after I get this fixed, I only have a few other small things to fix. One of which is a new steering pump, but I'll get to that eventually. I started looking at woofers and amps the other day, and it looks like the whole assembly is going to cost me around $400, but I want a custom box so I can keep all my storage space...so that'd bump me up around $500. We'll see how that goes.

1,000,000 miles strong.

Jeep Log: 235792 Miles

Many fixes today! I got some of those really annoying things fixed that I've been meaning to get around to.

Things fixed:
Headlight hood (driver front)
New driver's side fog light
Driver's seatbelt now works.
Left Passenger seat now has a window crank.
New spare tire bolt (where is that fuckin squeak coming from?)
New shifter boot
New passenger side mirror (now points in the proper direction and doesn't wiggle)
Got a lug wrench that actually fits my lugs (I call it a fix)

I noticed installing the shifter boot made the inside quite a bit quieter. Is nice. The salvage yard was pretty interesting to say the least. Pretty much every cherokee has the same problem I do with the rear sprayer. The only difference is some people have approached it differently. One car we saw (driver is/was a skater punk) had a sticker next to it that had the woman's bathroom symbol on it. Saw a lot of cherokees there, only one with red interior; and it was missing the driver's seat, but that's not a very big deal. I got the seatbelt I needed. I can honestly say I've put my blood and sweat into this car, I actually bled while trying to install one of the parts when the wrench sprung free and scraped my hand up a little bit.

With this, interior restoration is pretty much complete. The only things left to do (and these are more pet peeve things than anything) are listed below:

Interior:
Woofer
New front passenger seatbelt
Find the spare tire squeak.
New emergency jack (this one is kinda locked up, I consider it interior because it's under the back seat.)
First aid kit (yeah.....)
Driver's side mirror (it's starting to come loose now too)
Cup holder solution?

Exterior:
PAINT JOB!
Roof rack
Roof lights/exterior lights (10 total will be added)
Xenon bulbs for front lights.
New back bumper
New wheels
Some fancy new tires (like real snow tires type of thing)
Lights under neath?*

Drivetrain/performance:
New fan clutch (Hayes clutch is going out)
New tranny (I think it's taking a shit on me....again)

So yeah, that's pretty much the summary of what's left. It's definitely getting there. After I get the woofer, there's pretty much going to be one massive save up until I can get the outside painted. I've got high hopes for this jeep. I'm kinda worried about this tranny thing, I think my transmission is going out...again...and those are expensive.

*So about these lights, I'm thinking of rigging it up in such a way that when the doors are open, some lights come on under neath that light up the ground, could be good when you're four wheeling at night. Any second opinions on this idea?

Adventures of the Werewolf Killer, prologue

Well, because it is my most valuable possession, I am going to start writing a blog about my dearest 1987 Jeep Cherokee Pioneer (with the winter kit).

After today, I'm going to be keeping track of my ventures in miles, this is just square one. I went to Mag-Co (my trusted repair shop) for a second opinion about a sound my engine is making. As it turns out, my coolant fan's clutch is locking up. Hopefully, I'm going to fix this tomorrow with the pops. As for my audio system, it turns out that my speakers are actually wiggling the door pieces off their cheap little plastic ratchet bolts. I'm going to see if I can use some removable adhesive to hold it in place and get rid of the buzz. If it's removable, I should still be able to get to my speakers if I need.
This weekend, I'm going to try to hit up the salvage yard for some parts I need on it. My passenger mirror broke so I need a new one of those, I need a new driver's seat belt, some sort of spare tire carrier and cover, and a new crank for my PL (passenger left) window crank. Also if I can find it, I'd like to get a commander visor (self-dubbed name for those solid visor pieces that go over the windshield) and some sort of roof storage device. Some new wheels would be sick too, but we'll see how that plays out.

Oh, quick explanation on "werewolf killer."

My Jeep is silver and slow.
Silver bullets are also silver and fast (duh).
Silver bullets kill werewolves.
Cars kill animals every now and then.
So, in theory, a silver car should be able to kill a werewolf if the werewolf were unwittingly crossing the street in front of said car and collided with it.
Hence, my Jeep is a theoretical werewolf killer.

Yeah, I know.... L....O....L.

Jeep To-Do

Jeep Fixed/To fix.

It's a silver 1987 Jeep Cherokee Pioneer, 240k miles. My main problem with this vehicle is it's in disrepair. When I first got it, it was a nightmare. Ever since I got my license and started driving it, I have been working my ASS off to get everything in prime working condition. I have decided to post an UPDATED list of upgrades and repairs I have performed since I first acquired this vehicle:

-New tires
-New front brake calipers, left and right.
-Fixed a spare tire issue (used to come loose and squeak)
-Fixed corrosion hole in passenger right floor
-Laid dynamat (soundproofing flooring)
-New speakers (Infiniti tweeter/woofer combinations)
-Fixed back seat (back used to be broken, couldn't put it up)
-New battery
-Fixed driver door lock (didn't work from outside)
-Removed 3 (yeah, i know) wasp hives.
-New wiper blades front and back
-Fixed back wiper blade
-Back hatch interior panel is no longer falling off
-New front bumper
-Tightened steering wheel (you used to be able to move the steering wheel vertically and horizontally about an inch in every direction, now you can't).
-Fixed window washer sprayer pump
-New tie rod (Pulled right HARD).
-New brakes
-Fixed a hose that wouldn't stay attached (air intake filter)
-Fixed brake lights (bad connection)
-Replaced fuses for signal lights (does this one count?)
-Fixed a loose window trim, cuts down on window noise (I really do need a new one...)
-New floormats
-New battery terminals
-New starter relay
-Headlight alignment fix
-New spare tire

TO DO:
-Coolant fan clutch
-New serpentine belt
-Full body re-finish (paint job, body work, trim repair)
-Fix passenger mirror (completely borked)
-Woofer (still deciding on this one, it's like $700)
-Spare tire cover
-New windshield
-New power steering pump
-Fix speaker buzz

I still want to restore it to 100%. I know this seems like a daunting task, but I want this thing to be a vehicle to make jeep owners proud.

Introduction

It's a silver 1987 Jeep Cherokee Pioneer, 235k miles. My main problem with this vehicle is it's in disrepair. When I first got it, it was a nightmare. Ever since I got my license and started driving it, I have been working my ASS off to get everything in prime working condition. I have decided to post a list of upgrades and repairs I have performed since I first acquired this vehicle:

-New tires
-New front brake calipers, left and right.
-Fixed a spare tire issue (used to come loose and squeak)
-Fixed corrosion hole in passenger right floor
-Laid dynamat (soundproofing flooring)
-New speakers (Infiniti tweeter/woofer combinations)
-Fixed back seat (back used to be broken, couldn't put it up)
-New battery
-Fixed driver door lock (didn't work from outside)
-Removed 3 (yeah, i know) wasp hives.
-New wiper blades front and back
-Fixed back wiper blade
-Back hatch interior panel is no longer falling off
-New front bumper

Edit: forgot one

-Tightened steering wheel (you used to be able to move the steering wheel vertically and horizontally about an inch in every direction, now you can't).

I still want to restore it to 100%. I know this seems like a daunting task, but I want this thing to be a vehicle to make jeep owners proud.